Introduction
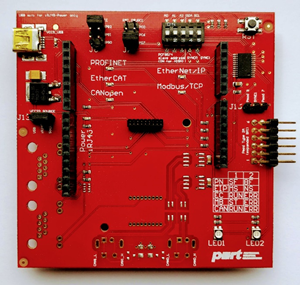
The Renesas RL78/G14 Fast Prototyping Board is an development board of the manufacterer Renesas. The device is a 16 bit CPU with 48kB of RAM and 512kB of ROM. It is capable as an application controller for the iRJ45/SoM module.
Currently the RL78/G14 is only compatible with uGoal.
Software
Integrated Development Environment
The e2 studio by Renesas is a free Integrated Development Environment which provides several utilities to develope and debug applications for the RL78/G14 Fast Prototyping Board. It is available on the Renesas website.
If you just want to use our applications, you won’t need the IDE.
Building and Flashing
There are two Toolchains available to build applications for the Renesas RL78/G14: the CCRL and the GNURL78 Toolchain. The former one is provided by Renesas and is free for applications up tp 64 kB of linkage size.
For our applications we use the GNURL78 toolchain, which is available here. Once installed and added to path you’ll be able to use our provided build system.
To flash the device we’re using the Renesas Flash Programmer. You can download the Programmer from here.
Getting Started
Preparations
Hardware Requirements
Make sure following settings are set:
J13 - Connect “iRJ45” with “Sockel”
J8 - Connect “CS_SOURCE” with “PB2”
J7 - Connect “RST_SOURCE” with “PD7”
Set all DIP-Switches to “OFF”
RL78/G14 Fast Prototyping Board
.JPG?version=1&modificationDate=1613601145288&cacheVersion=1&api=v2&width=340&height=228)
Per default there are no jumpers to set on this board.
Target System
.JPG?version=1&modificationDate=1613601145291&cacheVersion=1&api=v2&width=340&height=211)
Connect both boards (see Figure above). Voltage supply is done through the VCC33_Sockel by the Rl78/G14.
Please connect both boards with each other, before you connect them per USB to your computer.
Using delivered build system
Within a example folder “ugoal/projects/ugoal/<example name>/gcc” of the software delivery, build the firmware with following commands:
make PLATFORM=rl78g14
Use following command within the example folder, to flash the application onto the RL78/G14:
make PLATFORM=rl78g14 flash
The Renesas flash programmer directory must be added to the path variable, otherwise the build system won’t be able to flash the device.
If you want to clean the build, use following command:
make PLATFORM=rl78g14 clean
To run an application without connected debugger, the jumper EJ1 on the device must be closed.
Using e2 studio by Renesas
This chapter describes the integration of the source files into a new e2 studio project, to edit, compile and debug the software delivery.
Automatic project generation
From any project folder a project generator can be run to create an e2studio project for the application. The project generator requires a python3 installation. Required dependencies are installed automatically.
If you want to create a e2studio project, run the following command:
make PLATFORM=rl78g14 gen_project

Please select a template - OR - press <CTRL+c> and set the
GEN_PROJECT_TPL environment variable.

Choose IDE:
  [ 1] e2studio
  [ 2] eclipse
  [ 3] stmcubeide


Choice [1-3]:
For the RL78 platform the template number 1 needs to be chosen.
Selected template: [1] e2studio/renesas/rl78

gen_project
-----------
Project: 01_ethercat_rl78g14
Templates: /Users/torstenbitterlich/port/2015013_irj45/ugoal/tools/gen_project/templates/e2studio/renesas/rl78
Generating: RL78G14.ld .project .cproject renesasPGModel.xml e2studio_project.prefs DebugVirtualConsoleSetting.xml language.settings.xml CoverageSetting.xml IORegisterSetting.xml start.s
Output dir: /Users/torstenbitterlich/port/2015013_irj45/ugoal/projects/ugoal/01_ethercat/ide/e2studio/renesas/rl78g14/
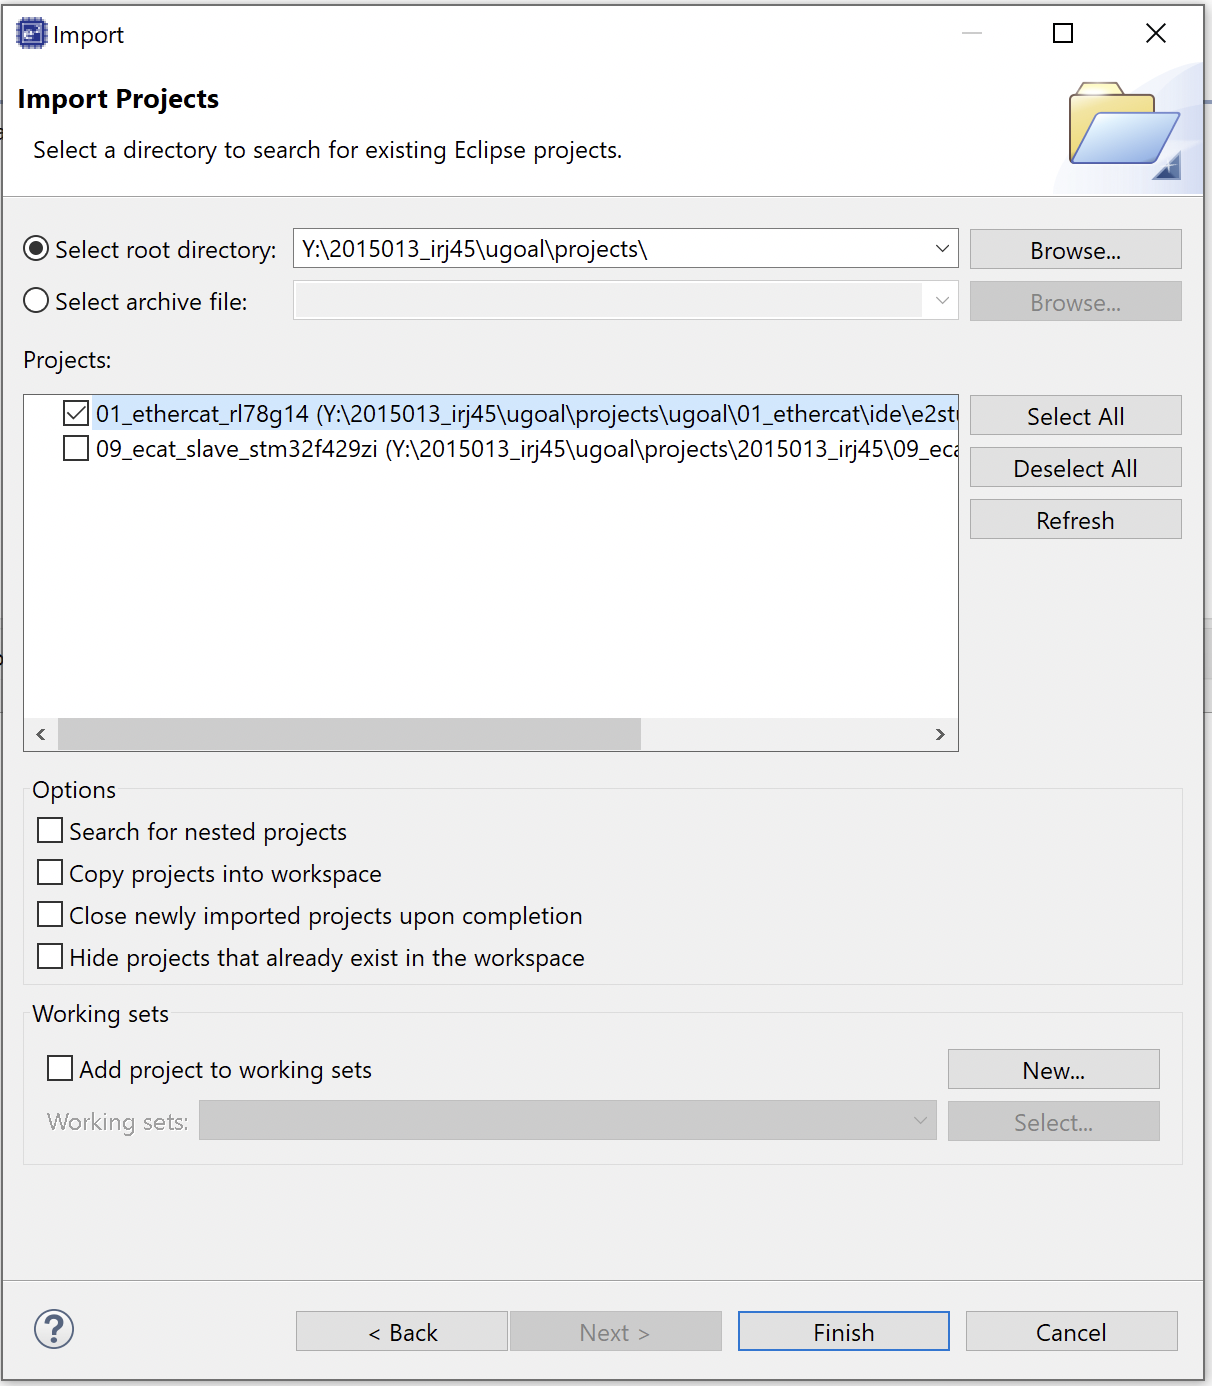
The generated project should be imported into e2studio using “Import → Existing Projects into Workspace” and be browsing to the project folder:
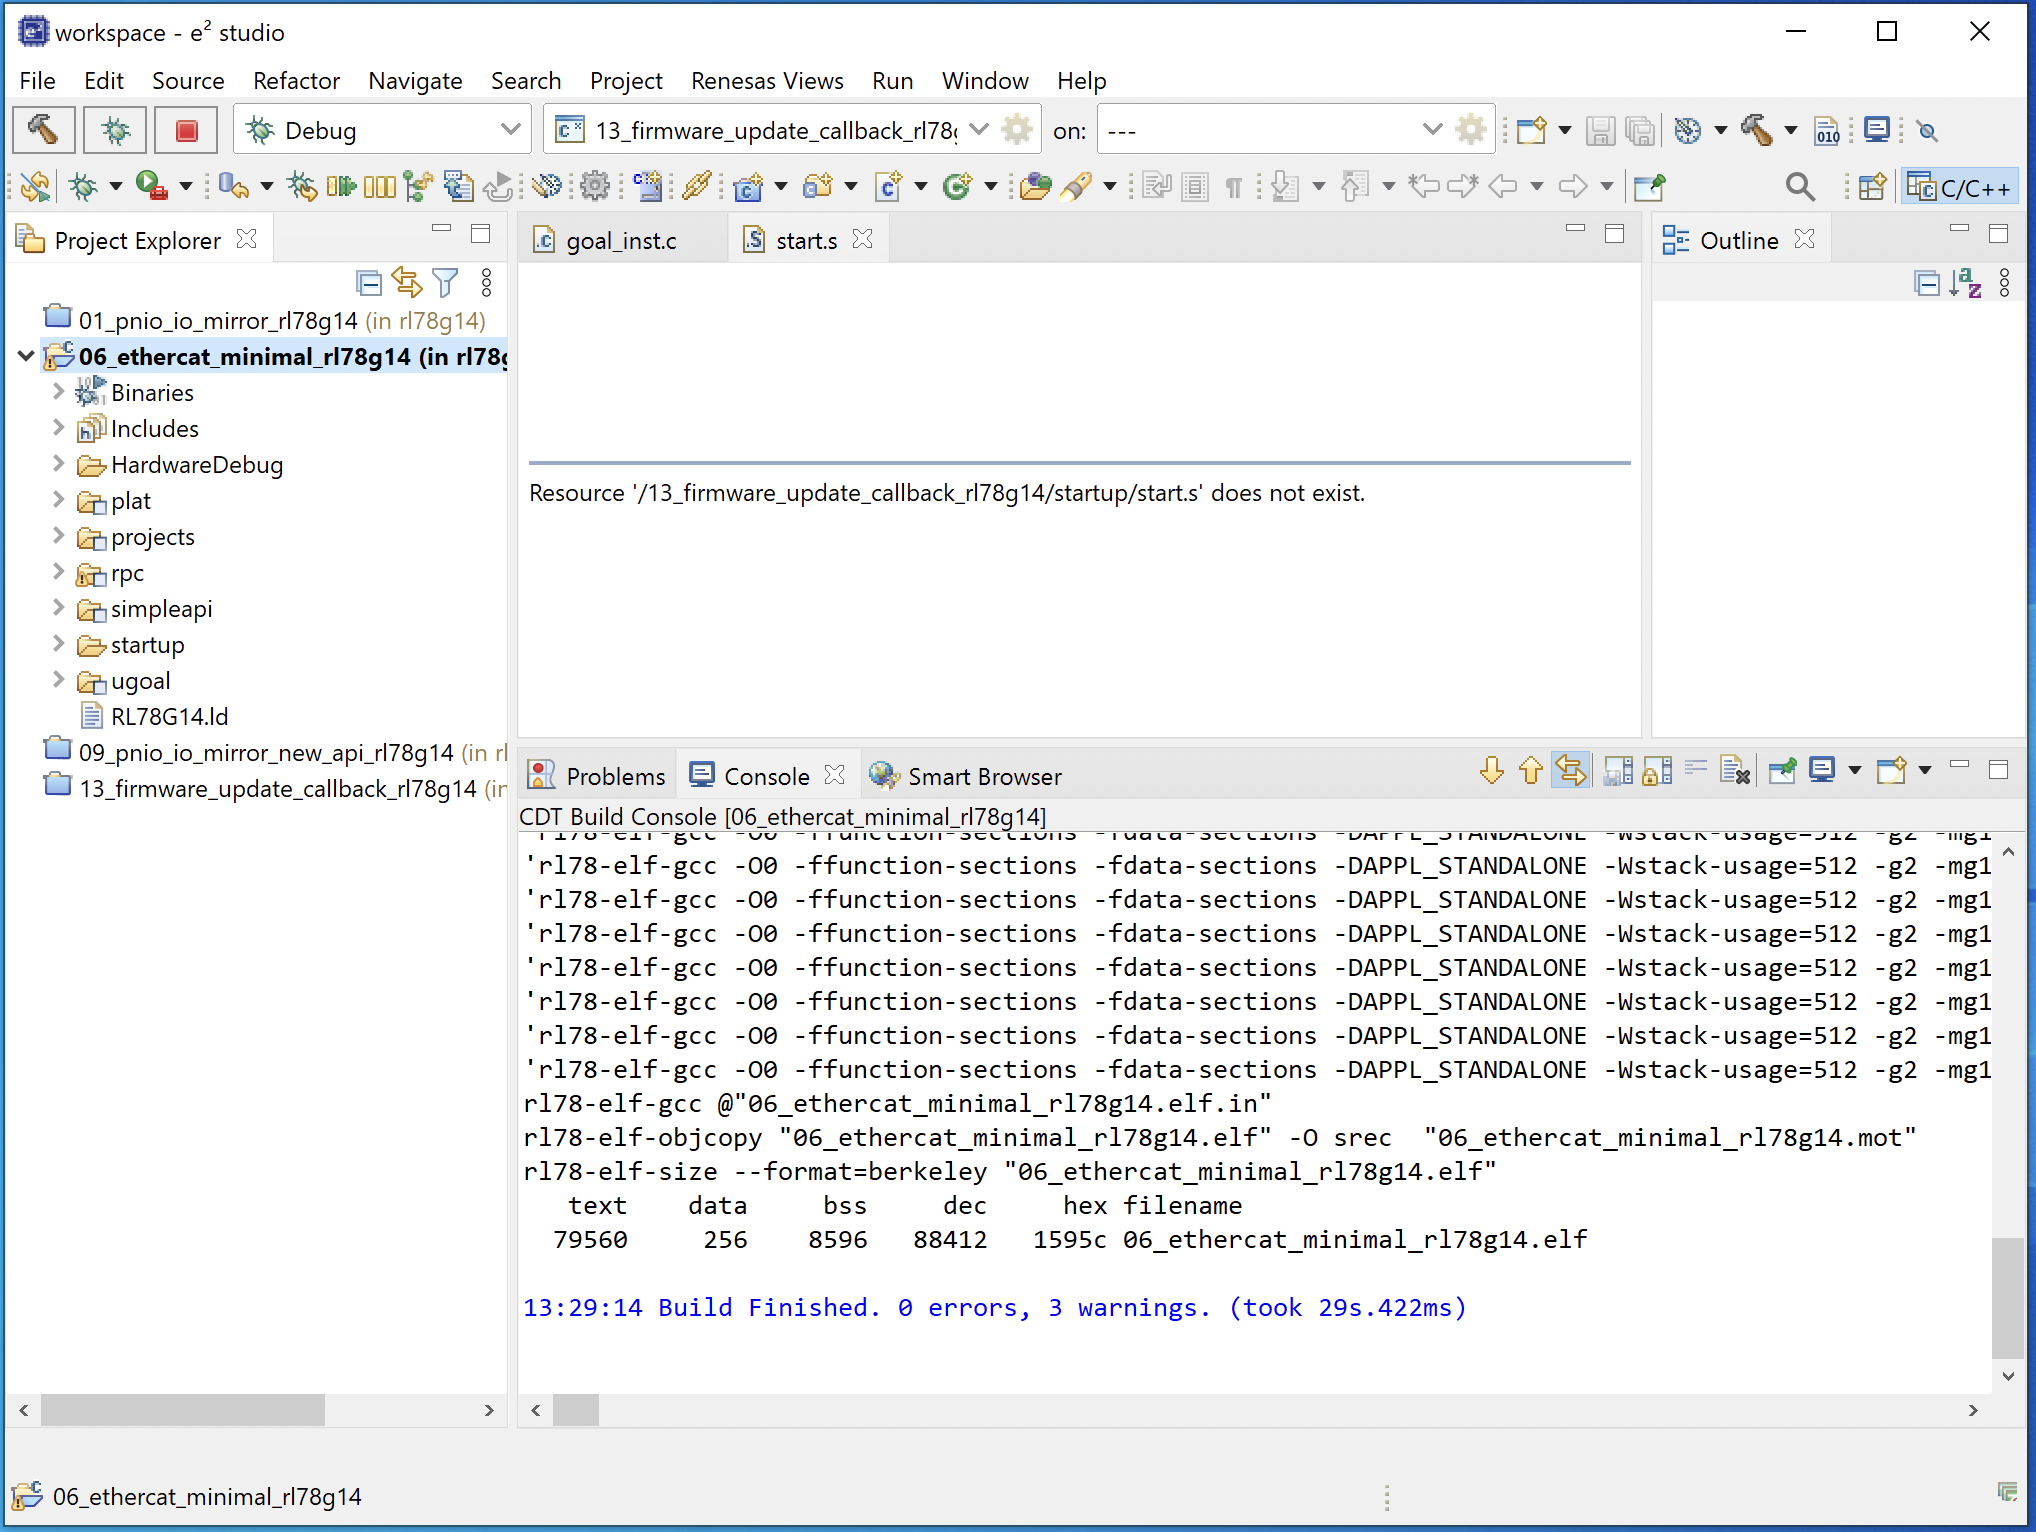
The imported project can be compiled and debugged:
Manually import sources into new project
Install the latest e2 studio with RL78 support, which is downloadable from https://www.renesas.com/us/en/software-tool/e-studio.
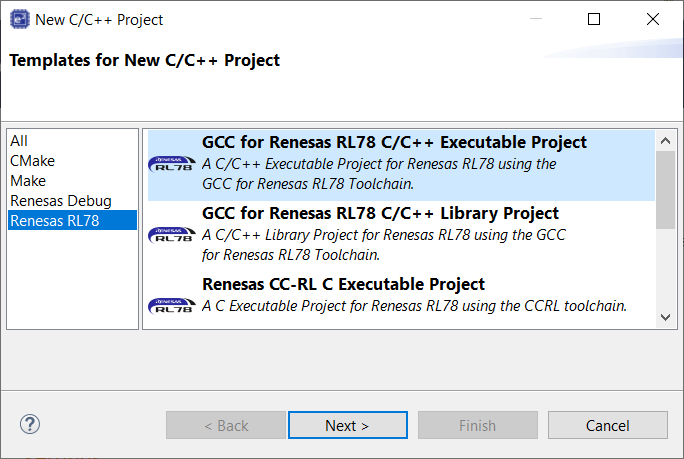
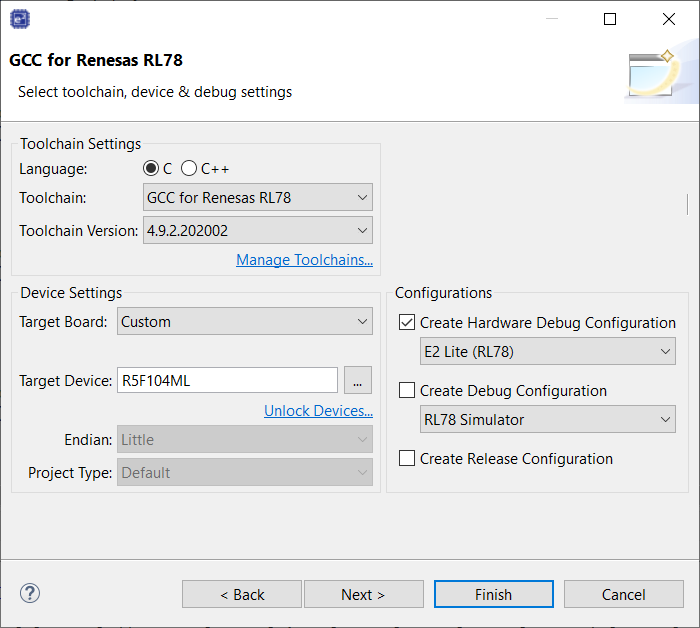
Open e2 studio and choose “Create a new C/C++ project”.
Choose the Template “Renesas RL78” and “GCC for Renesas RL78 C/C++ Executable Project”.
Choose a project name and click “Next”
Choose the toolchain “GCC for Renesas RL78“, target device “RL78-G14”>”80pin”>”R5F104ML” and “E2 Lite (RL78)” as Hardware Debug Configuration and click finish.
You’d successfully generated a new project. The next steps are showing the import and configuration of the uGoal project.
Click right on the project in the “Project Explorer” and select “Import”.
Select “General”>”File System” and click “Next”.

Choose the sources of the uGoal software delivery.
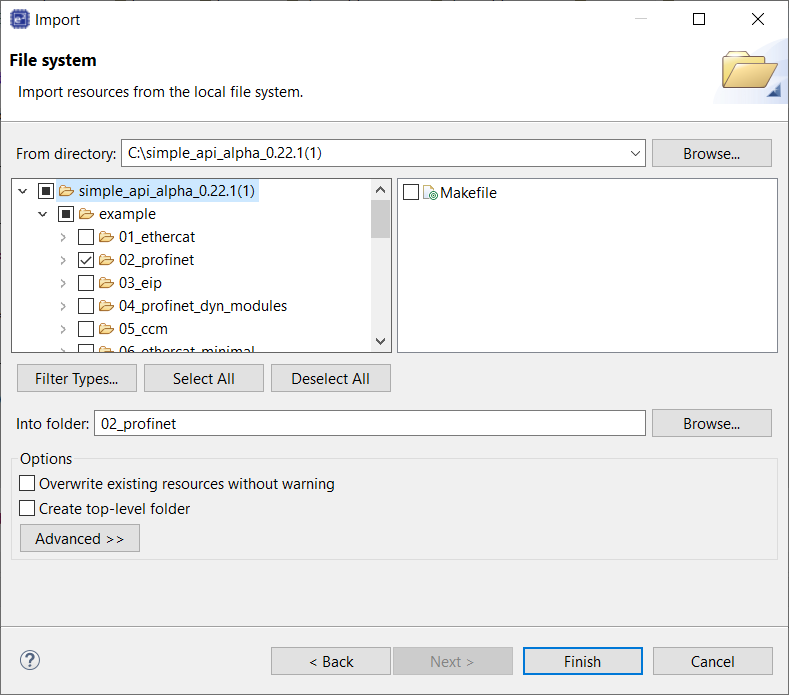 | 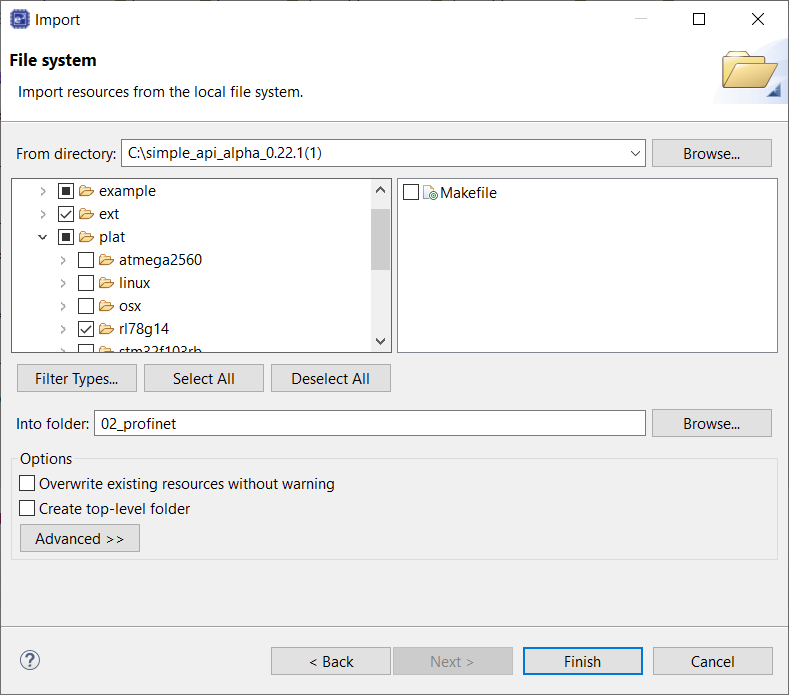 |
Import all sources of the software delivery, expect the examples and platforms you’re not using. If e.g. you want to use “example/02_profinet”, uncheck the applications “01_ethercat” and “03_eip” until “09_pnio_io_mirror_new_api”. Repeat this at the folder “plat” and import only the directory “plat/rl78g14”.
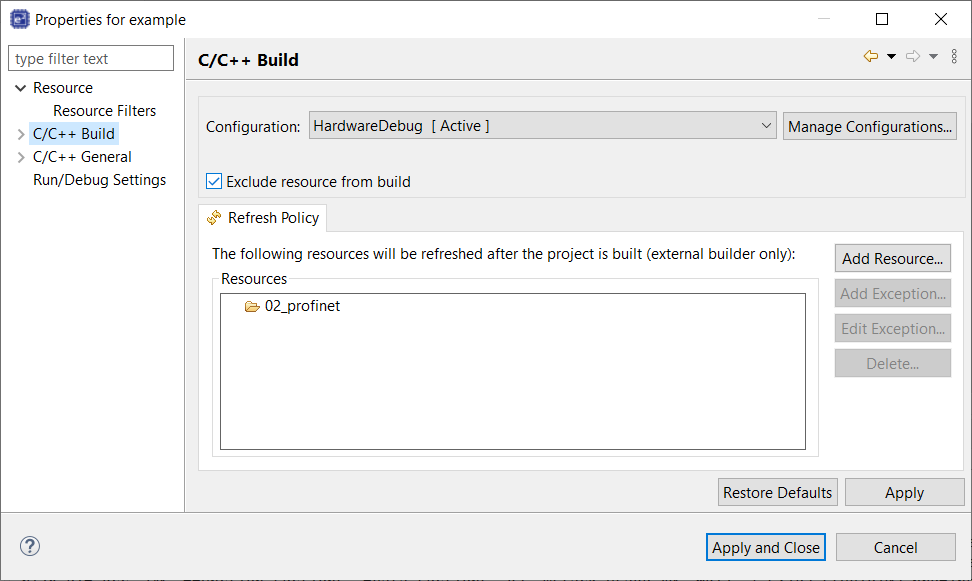
Right click on the imported folders in the “Project Explorer” and choose “Properties”.
On the property “C/C++ Build”, uncheck “Exclude resource from build” and select “Apply and Close”.
Repeat this step for all imported directories.
Right click on the root folder (e.g. “02_profinet”) in the “Project Explorer” and choose “Properties”.
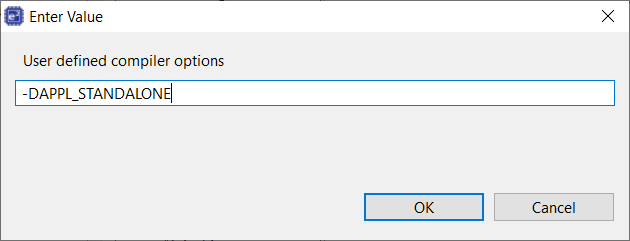
On the property “C/C++ Build”>”Settings”, choose “Tool Settings”>”Compiler”>”Source” and add the user specified define “-DAPPL_STANDALONE”. Confirm with “OK”.
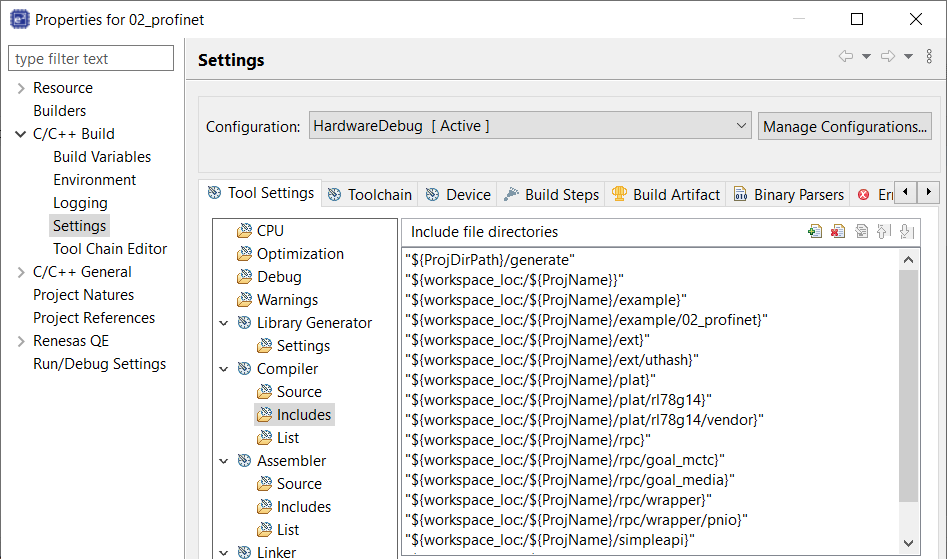
Choose “Tool Settings”>”Compiler”>”Includes” and add all imported directories and subdirectories to add these to the include path. Click “Apply”.
Choose “Tool Settings”>”Linker”>”Source” and replace the linker script by the file “${workspace_loc:/${ProjName}/ugoal/plat/rl78g14/vendor/RL78G14.ld”.
Choose “Tool Settings”>”Linker”>”Miscellaneous” and check “Use newlib-nano”.
Remove the directories “02_profinet/generate” and “02_profinet/src” from the root directory, as uGoal includes all necessary platform driver.
Now the project is succesfully integrated and configured.
Build and Run application with e2 studio
Click “Build” in the upper left corner of e2 studio, to build the application. The output should look like this:
rl78-elf-gcc -O0 -ffunction-sections -fdata-sections -g2 -Wstack-usage=40 [...]
rl78-elf-gcc @"02_profinet.elf.in"
rl78-elf-objcopy "02_profinet.elf" -O srec  "02_profinet.mot"
rl78-elf-size --format=berkeley "02_profinet.elf"
   text	   data	    bss	    dec	    hex	filename
  68686	    372	   8854	  77912	  13058	02_profinet.elf

00:44:48 Build Finished. 0 errors, 118 warnings. (took 6s.815ms)
The compiler shows several warnings regarding stack usage of more than 40 bytes. This can be disabled in the project settings
To debug the application, you’ll have to change the debug configuration.
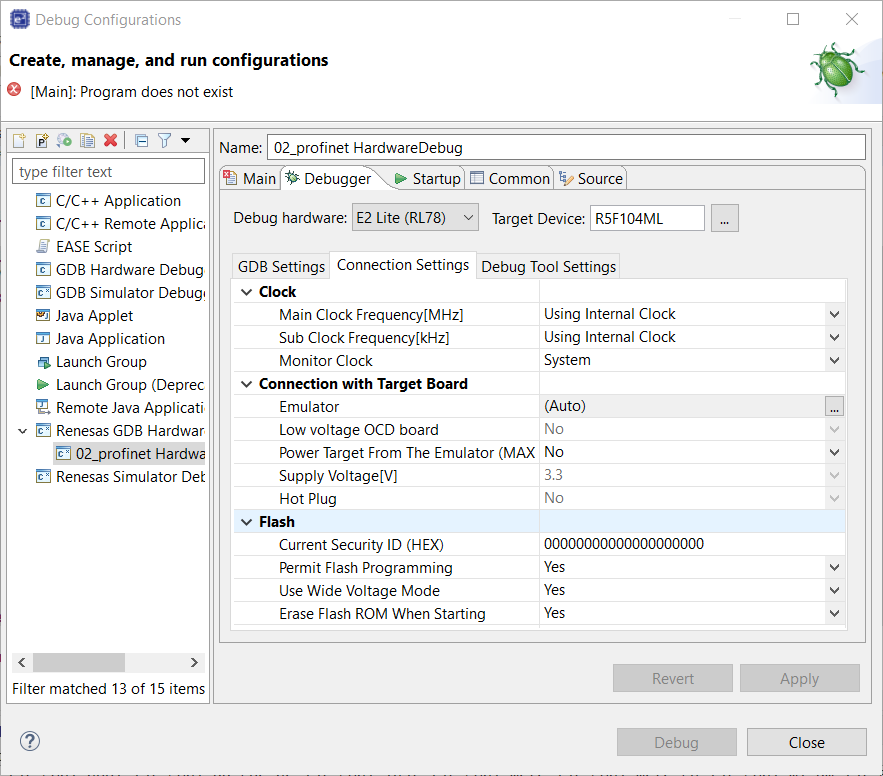
Choose in the Toolbar of e2 studio “Run”>”Debug Configurations”.
Choose “Debugger” and “Connection Settings” and change “Power Target From The Emulator” to “No”. Apply the changes.
Now the build *.elf can be started by selecting “Launch in ‘Debug’ Mode” in the toolbar.
Debugging
UART
The RL78/G14 Fast Prototyping Board provides multiple UART-interfaces. In the example application the UART0 is used. You can access the UART by the PMOD1 interface by connecting a USB-to-serial adapter to the TxD0 of the RL78/G14 and launching a serial monitor like putty. Choose the following settings:
Speed | 115200 |
Data Bits | 8 |
Stop Bits | 1 |
Parity | None |
Flow Control | XON/XOFF |
Application
After setting up the serial monitor and starting the application, the output should look like this:
[INF] ../rpc/goal_mctc_rb.c:277 creating rpc ring buffer with buffer size 768 and elem size 256
[INF] ../rpc/goal_mctc_rb.c:277 creating rpc ring buffer with buffer size 768 and elem size 256
[INF] ../goal_media/goal_mi_mctc.c:793 rpc transfer size set to 1024
[INF] ../goal_media/goal_mi_mctc.c:723 peer requested Sync Init
[INF] ../goal_media/goal_mi_mctc.c:723 peer requested Sync Init
[INF] ../goal_media/goal_mi_mctc.c:723 peer requested Sync Init
[INF] ../goal_media/goal_mi_mctc.c:723 peer requested Sync Init
[INF] ../goal_media/goal_mi_mctc.c:455 RPC state synchronized, running appl_setup
[INF] ../goal_media/goal_mi_mctc.c:458 configuring timeout values for peer
[INF] ../pnio/goal_pnio_rpc_ac.c:259 PROFINET Application Core successfully started
[INF] ../example/02_profinet/goal_appl.c:188 Initializing device structure
[INF] ../example/02_profinet/goal_appl.c:230 PROFINET ready
[INF] ../goal_media/goal_mi_mctc.c:487 local setup done
[INF] ../ugoal/ugoal.c:212 HEAP utilization: 3400/4096 (83%).
Known Issues
Following you’ll find current limitations regarding the RL78/G14.
Some applications will not start if logging is enabled. The reason is a limited memory area of 3,75 kB for read-only variables. Currently all logging-strings are placed in this area which leads to an overflow.
The I2C interface will not working, if the compiler optimization is set to “-o2”. We recommend to build the applications optimization disabled.